Workbench
The story, in a few pictures, of the first workbench I built.

|
The Plan: This is where it all started. A very rough sketch of the dimensions I felt would work well for my bench, based on the no longer directly available Bob and Dave's Good, Fast, and Cheap Bench pages (local PDF archive from net), with added features I thought would suit how I planned to work. Particularly egregious violations of Key's First Law of Bench Building (see the PDF) are the incorporation of the shoulder vise and the modifications to the leg design. |

|
The Wood: Following Bob and Dave's general plan, I built my bench from construction-grade lumber using mostly hand tools. A pile of Douglas-fir was delivered direct to my house from the local large-scale lumber supply yard, saving me from having to take 15 trips in my four-seater car to retrieve everything. You can see the dimensions of wood I purchased for the project on the plan above. I kept the wood stickered in this pile in the garage, where I built the bench, for approximately a month to hopefully allow it to equalize with the surroundings. Given the wood arrived sopping wet from recent rains, that probably wasn't long enough, but not having a moisture meter to find out for sure and being impatient to start, I plunged on. |

|
Dog Holes: These are the secret to the efficiency of a good workbench. They make it easy to clamp work of nearly any size securely on the front edge of the bench using a a "tail vise" at the end of the bench.
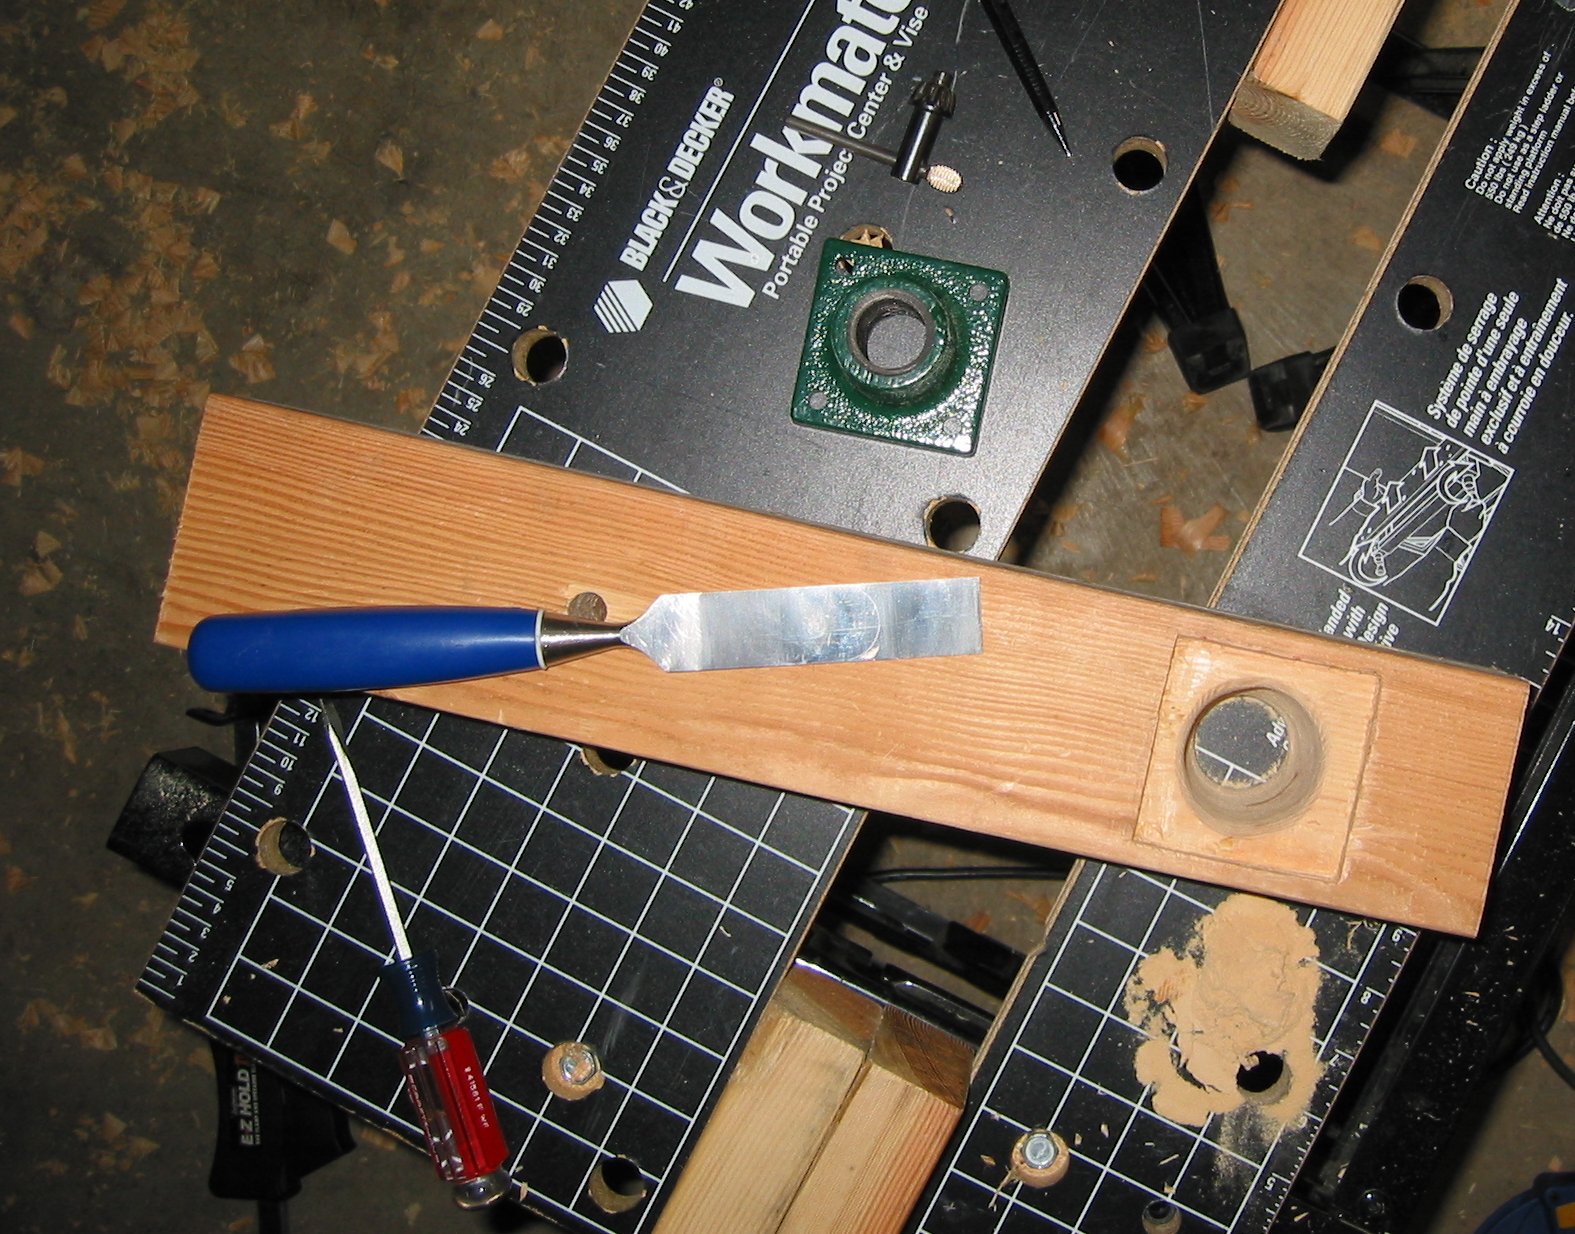
Dog holes can be round, or square. There are legions of arguments over which are superior, the details of which I won't venture into here. The key thing to know is that round dog holes can be created at any time, just drill a hole in the completed bench. Square holes on the other hand pretty much need to be built into the bench from the beginning. Not wanting to regret having missed the opportunity to have square dog holes later and being a bit concerned about round holes deforming in the relatively soft Douglas fir I used, I decided to go with square holes. Here you can see the cutouts that will form the holes, with a manufactured steel dog inserted in the center one to test the fit. Eventually, another 2x4 will be glued to this one to cover the front of the holes.
|
|
Shoulder vise socket: This picture illustrates one of the reasons why adding the shoulder vise was not as simple as I had originally expected. Take a look at the green metal piece on the bench in the upper middle of the picture. This is the socket through which the vise screw turns to move the face in and out. For maximum capacity of the vise, it needs to be embedded in the wood piece that forms the "arm" of the shoulder vise. Notice that the sides of the cylinder are not parallel but slope at an angle. Not as simple as just drilling a hole. This is one area where I resorted to using a power tool to accelerate the work. I mounted a sanding drum in an electric drill and used it to profile the sides of the hole. The chisel in the picture was used to make the square cutout for the base by first defining the edges with vertical cuts straight down and then shaving off strip after strip held bevel down like a plane. I found this process very pleasurable, especially after the messy and loud profiling with the sanding drum. I suspect that carving may have a similar feel and have started to plan to test that one of these days. |

|
Shoulder vise in place: Here the vise socket is installed. The fit isn't perfect, but it's not bad either. There isn't much else to say about this picture, so I'll mention something about the bench used to build the bench. One of the difficulties of building a bench early in your woodworking journey is that it is a very large item with large pieces. This is especially true if you don't have large power machinery like a table saw, jointer, and/or planer and thus plan to do most of the work with hand tools. You constantly find yourself thinking about the fact that building the bench would be so much easier if you already had it done. As is clearly visible in this and the last few pictures, I primarily used a workmate to build my "real" bench. This worked out okay, but in hindsight, I should have saved the money I spent on the workmate and built a couple of sawhorses with some of the extra lumber purchased to make the bench. The workmate is a nifty portable bench with some clever clamping options, but it really isn't up to holding six foot long 2x8s while vigorous activity is taking place. Two sawhorses and a couple of reasonable size hand-screw clamps would have done a better job less expensively and I wouldn't have to figure out what to do with a leftover portable bench I never use. |
|
Gluing up the top: This picture shows the top at full width but without the shoulder vise. I didn't glue all the pieces together in one go as the picture implies however. The three pieces on the left (1 2x4 on edge, 1 2x8 flat, and 1 2x4 on edge) form the tool tray and were glued together ahead of time. The remaining 2x4s on edge on the right from the bulk of the bench top. These were glued together one by one ahead of time as well until, at the point this picture was taken, the tool tray and the top are being glued together. You can't really see it in this or any of the other pictures, but another reason the shoulder vise was tricky to add to the design was that the glue joints are not sufficiently strong to resist the forces generated by the vise while clamping a board without reinforcement. I chose the common strategy of passing a 1/2in threaded rod through the boards on which nuts are tightened on either side. Since I'm not aware of any way to drill a straight 1/2in hole more than 2ft deep, this meant drilling each 2x4 separately and lining up the holes during clamping. It was a challenge, but it worked! |

|
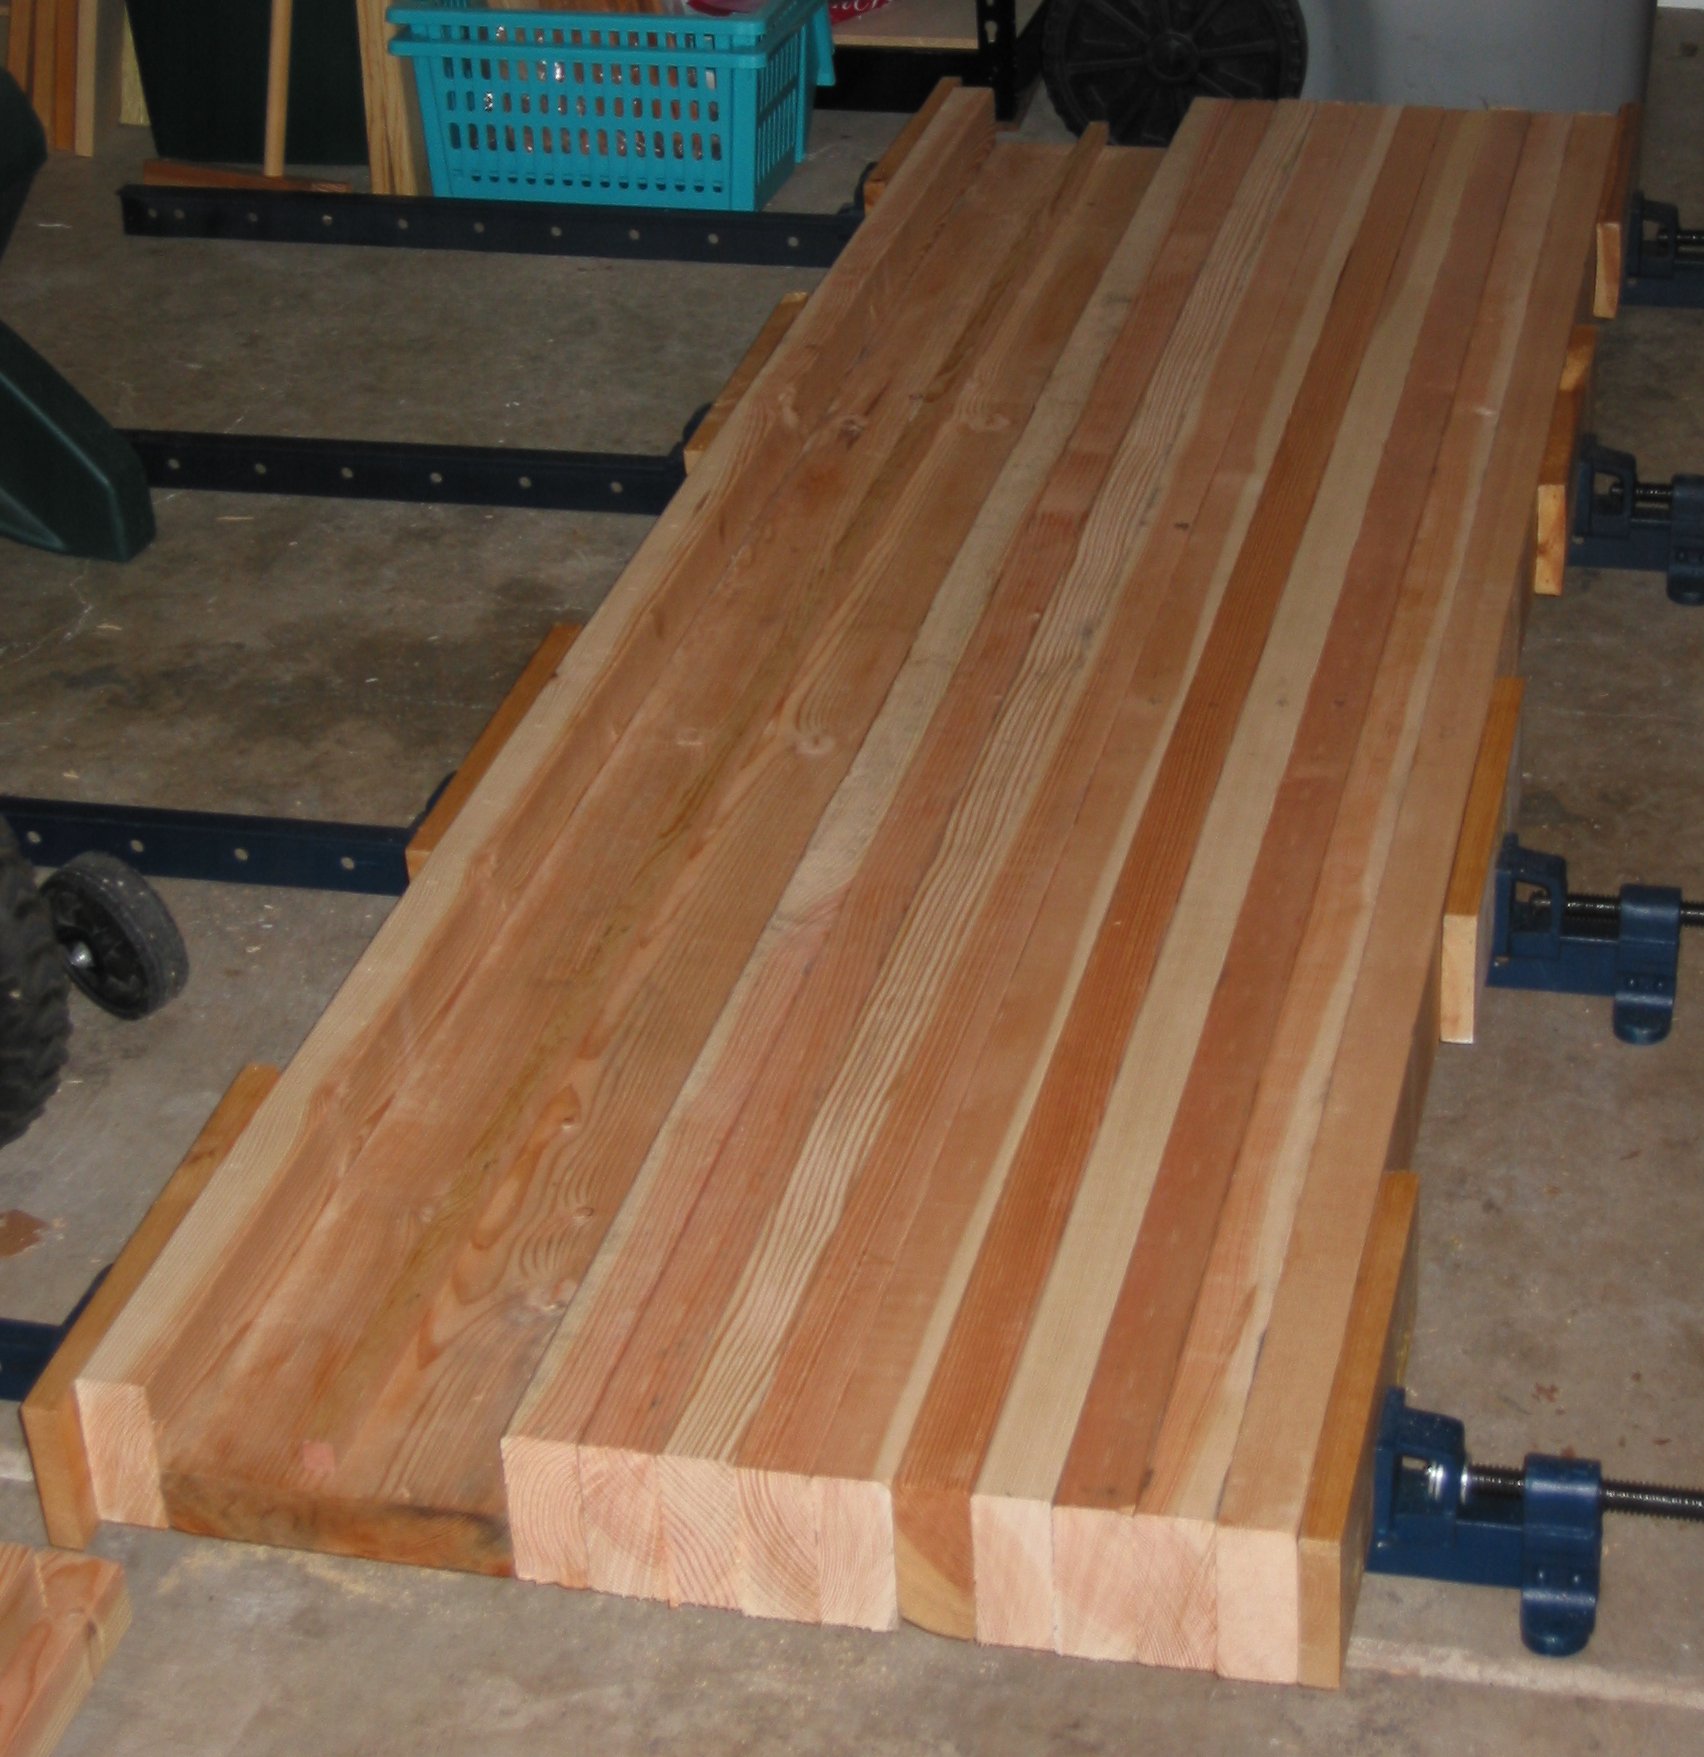
Ready for final assembly: Here you can see all the pieces of the bench before final assembly. They've all been finished with Waterlox Original, which was relatively easy to apply and looks nice. You can clearly see the square dog holes in the bench top. Most of the the round holes in the top are for bolts that will hold the top to the legs and the manufactured vise used as an end-vise in position. Having the holes through the top like this is a somewhat inelegant solution, but I wanted to be able to disassemble the entire bench in case it was difficult to move assembled. After the year plus of trying to find time on weekends, I was desperate to finish the project, and didn't spend too much time trying for something better. |

|
Left side view of assembled bench: Amazingly, with a little brute force, all the pieces fit together and the bench was stable and sturdy. In this picture, you can clearly see for the first time the handle on the shoulder vise. That is the one part of the bench I didn't make myself. It was store-bought, but finished with the same Waterlox original, it matches pretty well. |
|
Shoulder vise detail: In this top view of the shoulder vise, you can see most of the details of the construction. The bolt in line with the vise face is one of the bolts holding the top to the legs. If you look closely along the front of the vise up just a bit from there you can just see the end of the reinforcing threaded rod sticking out. |

|
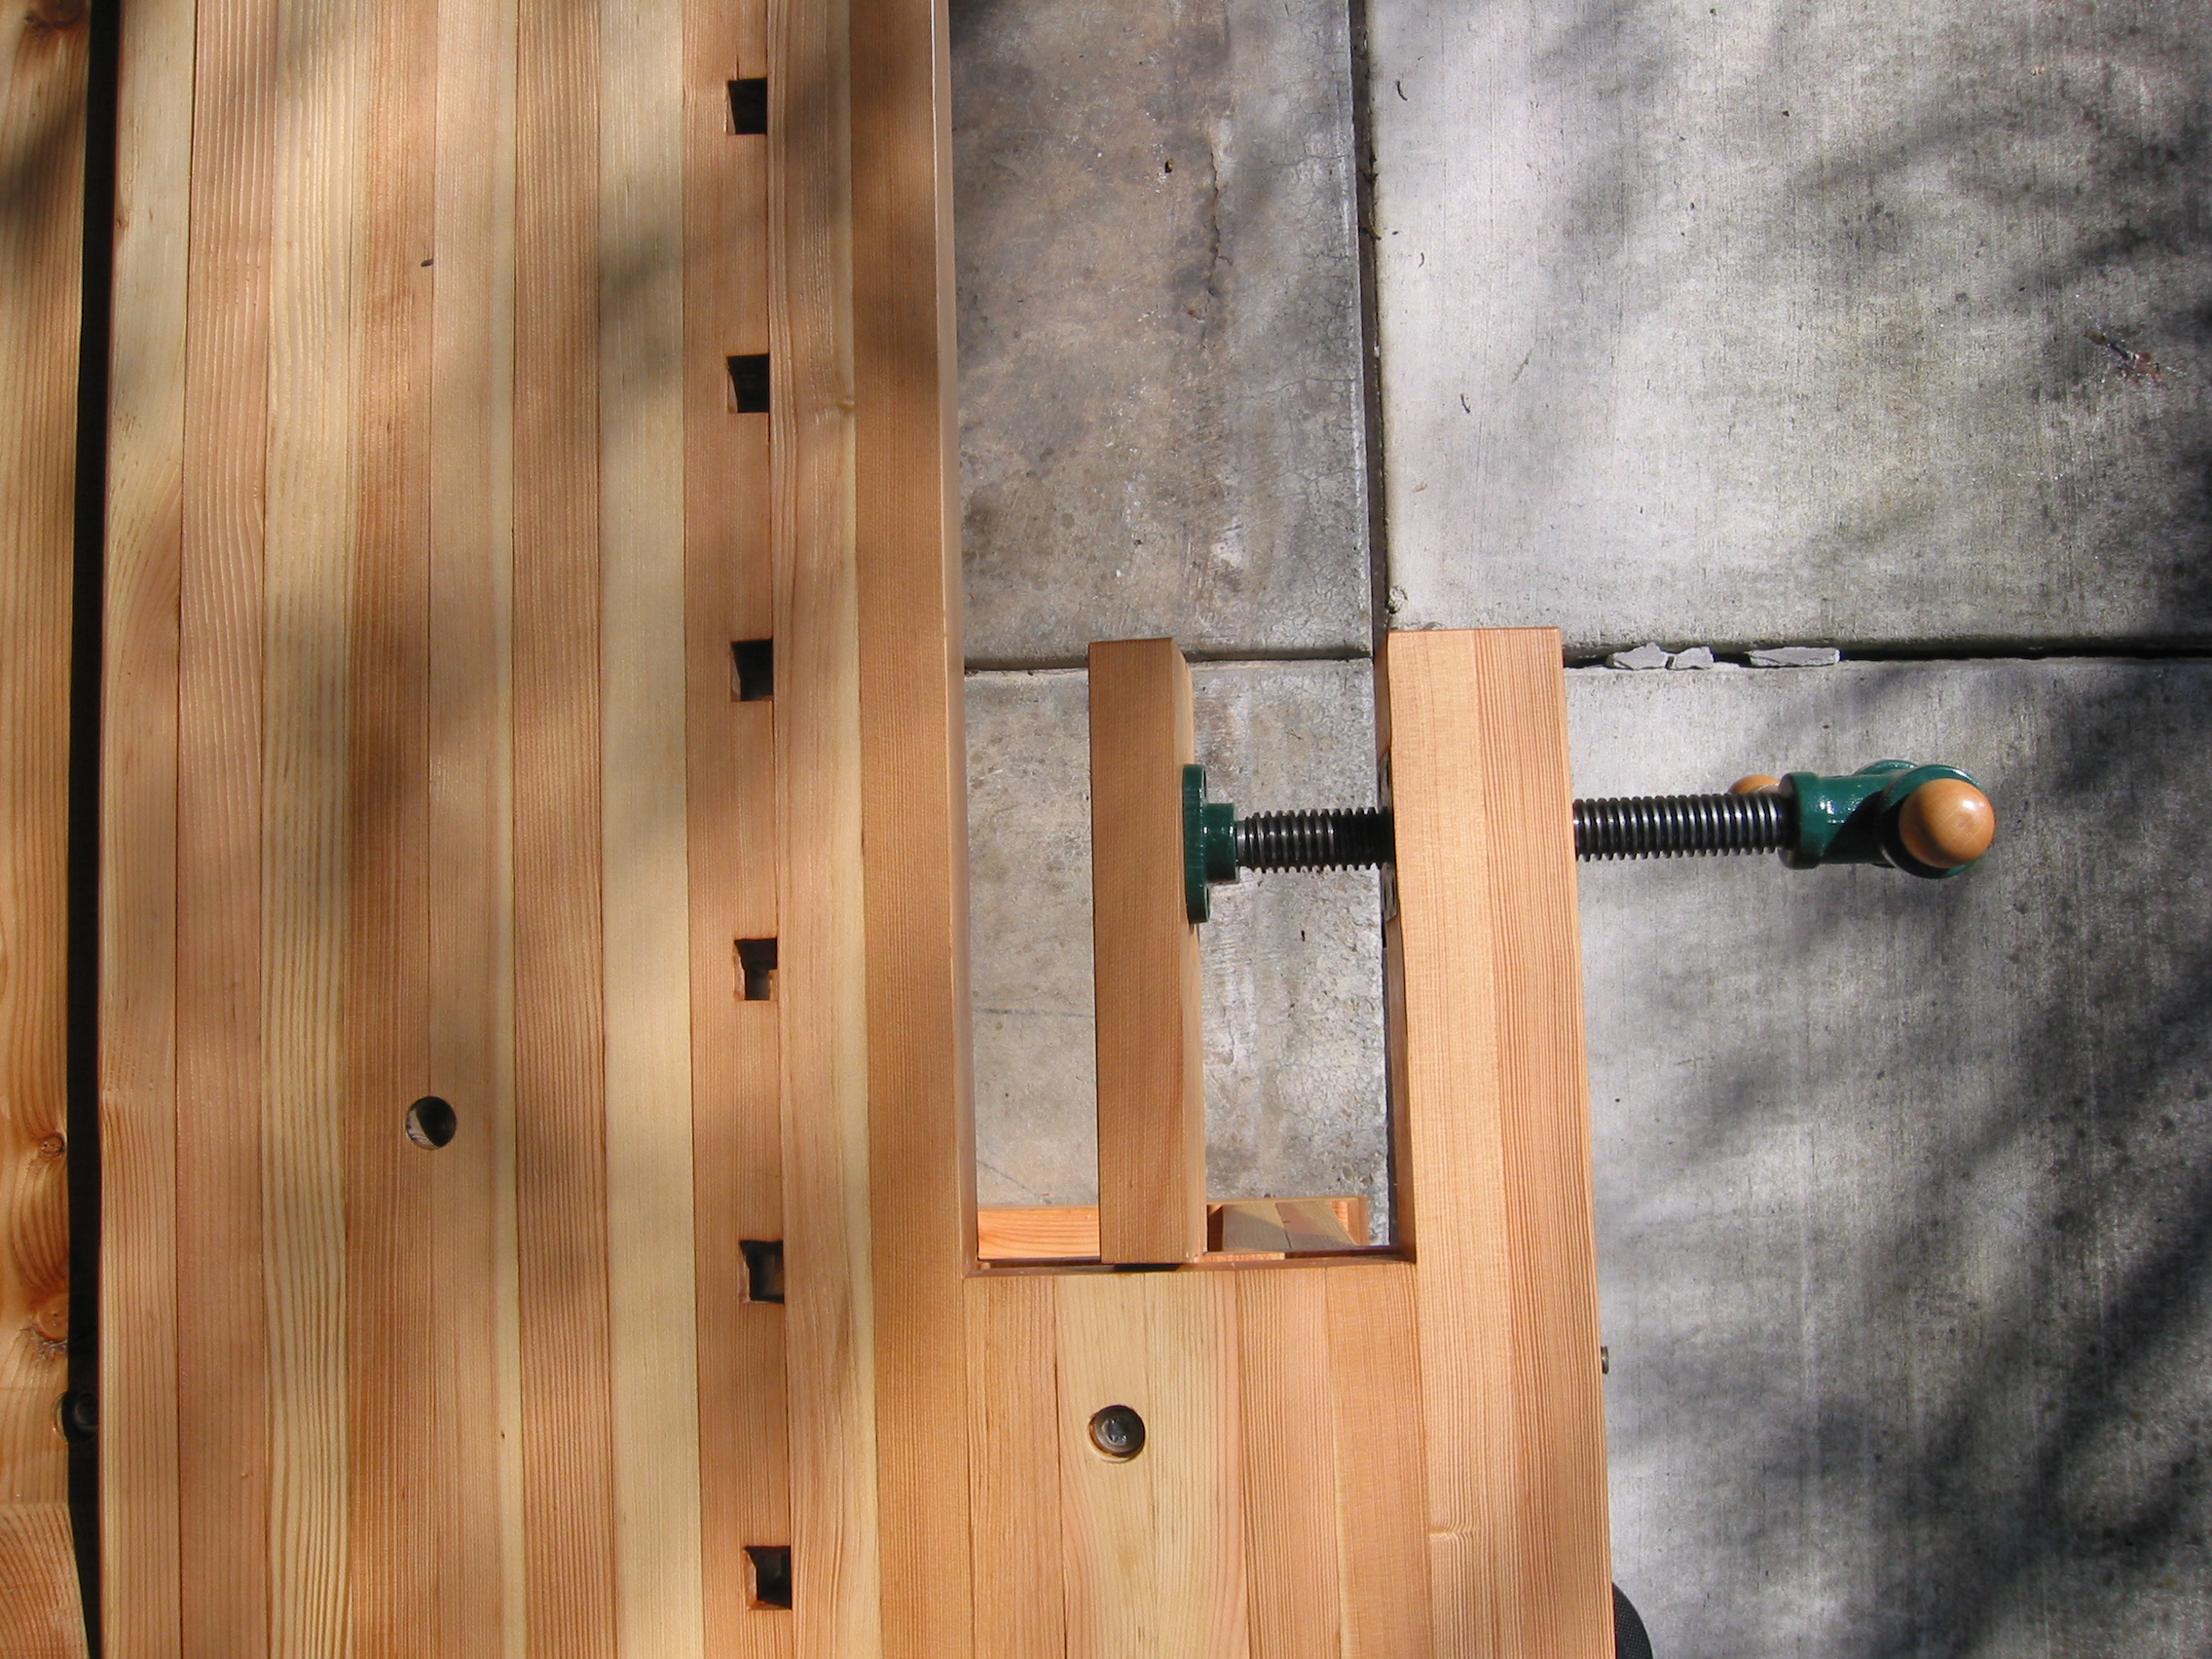
Rail joinery detail: Because I wanted to be able to break the entire bench down, I used wedged mortise and tenon joints to connect the rails to the leg units. I was somewhat concerned that they might loosen too easily when using the bench, but I found in practice this does not happen. All the pieces are so massive nothing moves at all. Looking at this closeup, you can easily identify many areas of less than perfect workmanship. One of the nice things about working on something of this scale that is relatively overbuilt is that you can make a lot of mistakes and it will still work wonderfully. Building the bench before I really had any clue what I was doing in woodworking ensured that I made a plethora of mistakes. But that was part of the point. I learned a tremendous amount from the project, and those are mistakes that are hidden in my garage, not displayed in a more public place. |

|
Right side view of assembled bench: In this view, you can clearly see the manufactured vise I chose to use as a simpler alternative to constructing my own tail vise. As Record stopped producing vises at the time that I purchased this, it may be one of the last ones manufactured. I don't know if anyone makes them in England any more either. One thing to be aware of if you plan to use a manufactured face vise as a tail vise like this is that you actually want a relatively small one. Not having seen the vise in person, I had originally ordered a larger Record model which I returned after I realized that it 1) required the dog holes to be set too far toward the center of the bench, 2) required the bench legs to be set back very far to make room for the screw and guide rails, and 3) was extremely heavy. The smaller vise was definitely the way to go. |

|
Front view and summary: Here is the whole thing, finally completed. With all the features I added and my marked lack of time and skill, construction ended up taking a year and four months instead of an intense weekend. Not quite what I thought I was getting into at the beginning, but worth every minute I was able to free from other tasks to work on it. Since I completed the bench, I've done numerous small projects with it and I am still amazed at how dramatically it accelerates hand-tool work. Without a bench time must be spent figuring out how to hold work safely in an appropriate position each time you move it for a new operation. It's a minuscule amount of time in each instance, but gets repeated so frequently that you soon find all your working time has been consumed by these simple setup tasks. I have no doubts that building this bench was the best project I could possibly have undertaken both to improve my skills and to assist future work. I would highly recommend building a bench as soon as possible to anyone seriously interested in woodworking. |